Any project that is going to be used by fellow developers is going to need some amazing documentation.
The most important thing for any documentation is being well-maintained.
Vue 3 and the new Vite build tool gives us another way to rapidly develop static sites.
Introducing VitePress.
In this quick tutorial, we’ll see how we can use VitePress to rapidly create documentation for our Vue app.
Here’s what we’ll have at the end of our app.
Excited?
Me too. Let’s get into it.
So what is VitePress?
VitePress is a Vue-powered static site generator built on top of Vite.
Called “the little brother of Vuepress” in its documentation (which uses VitePress), it has some advantages over its counterpart.
- Built on Vite not webpack so faster start times, hot-reloads, etc.
- Uses Vue 3 to reduce JS payload
- Lighterweight
One reason that VitePress is able to accomplish these goals is that it is much more opinionated and specific than VuePress – which has gotten more complex over the years.
While it’s not intended to completely replace VuePress as Vue’s static site generator, VitePress offers a lightweight alternative. For most projects like documentation and simple sites, Vitepress’s specificity and minimalism will make development a breeze.
Okay – let’s create our VitePress project
To get started with VitePress, the first thing we want to do is create our directory.
mkdir vite-hello-world
cd vite-hello-world
Then, we want to initialize our package manager and add VitePress – for this tutorial, I’m going to use npm.
npm init
npm i --save-dev vitepress
Next, we’re going to want to add our VitePress scripts to our package.json file.
{
    "scripts": {
        "docs:dev": "vitepress dev docs",
        "docs:build": "vitepress build docs",
        "docs:serve": "vitepress serve docs"
    }
}
Okay – let’s a docs folder and make our first markdown file.
Let’s run our application.
mkdir docs
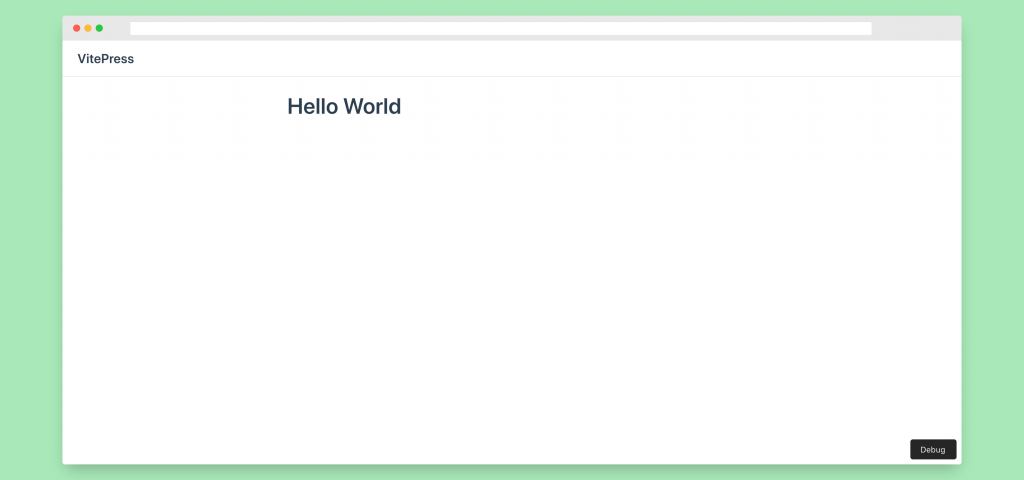
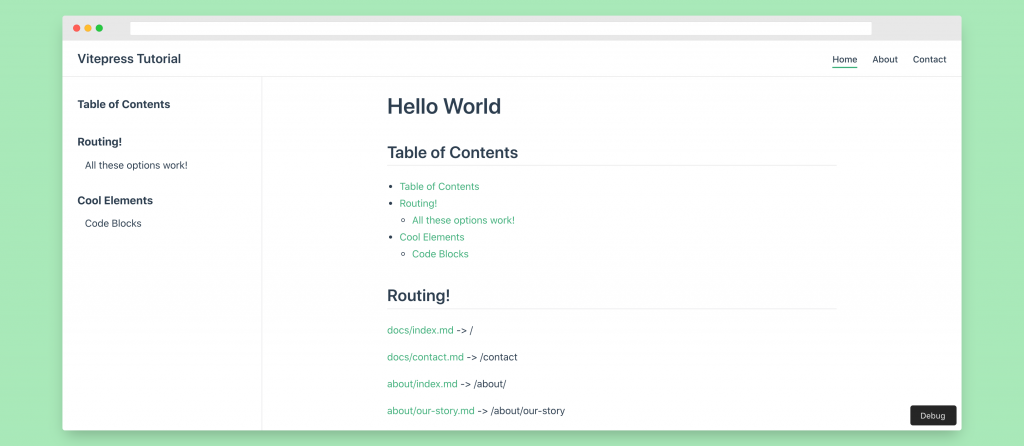
echo '# Hello World' > docs/index.md
We’ve created our site! If we navigate over to http://localhost:3000, we’ll see our markdown file being rendered in a webpage!
Exciting! Let’s start customizing our site and using more VitePress features.
Get Notified When Courses Launch
The first batch of courses is scheduled to come out soon:
- Fullstack Nuxt (Supabase, Drizzle, TypeScript)
- Writing Better Vue Composables
- Building a Nuxt Content Site
Be the first to know when courses drop (and maybe even get early access) by joining the waitlist.
Customizing our VitePress Site
VitePress Navigation
Adding multiple pages to your VitePress site is as easy as creating more markdown files to your project.
Let’s create a few pages and subdirectories in our project – our docs/directory should now look like this.
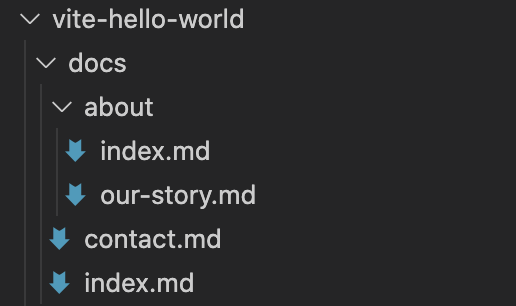
When VitePress creates our SPA navigation, it uses the path of each markdown file to create a route. Additionally, files named index.md in any folder can also just be referenced by /.
For example, our file structure translates to the following routes:
## Routing!

[docs/index.md](/) -> /

[docs/contact.md](/contact) -> /contact

[about/index.md](/about/) -> /about/

[about/our-story.md](/about/our-story) -> /about/our-story
In our markdown files, we have three ways of linking to routes. We can either use the base url, add .md or .html – all will properly link to the right component.
### All these options work!

[docs/contact](/contact) |
[docs/contact.md](/contact.md) |
[docs/contact.html](/contact.html)

Adding a Navbar and Sidebar to our Site
VitePress gives us a great default theme. It’s minimal, but powerful and easy to customize.
First, let’s add some navigation to our site with a sidebar and a navbar.
To do this, we need to create a configuration file – we can do this inside a /docs/.vitepress/ folder that will house our VitePress specific files. Our file will be called ./vitepress/config.js and just needs to export a JS object.
module.exports = {
    title: 'VitePress Tutorial', // appended to all page titles
}
Inside this object, let’s add a property called themeConfig that looks something like this.
module.exports = {
    // ...
    themeConfig: {
        nav: [],
        sidebar: [],
    },
}
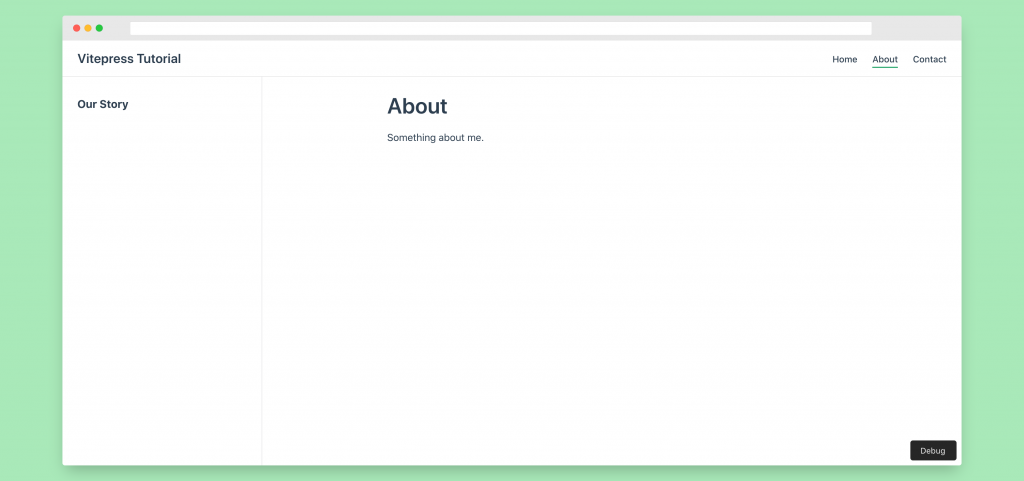
To add elements to our navbar, we just need to add objects to our nav array with the format { text: 'ANCHOR-TEXT', link: 'PATH' }, let’s add a link to our home page, contact page, and about page.
module.exports = {
    nav: [
        { text: 'Home', link: '/' },
        { text: 'About', link: '/about/' },
        { text: 'Contact', link: '/contact' },
    ],
}
To add to our sidebar is exactly the same way. Let’s add links to some of our headers.
module.exports = {
    sidebar: [{ text: 'Our Story', link: '/about/our-story' }],
}
Going back to our browser, we can now see that VitePress generates a pretty nice looking navbar and sidebar just from the few lines of configuration.
One cool thing that we can do with VitePress sidebars is to change the sidebar depending on what page we’re on.
Let’s say that we want our home page to display its headings, but we want all our other pages to show the sidebar we just made.
The first thing we have to do is create store our our-story sidebar as a variable.
const primarySidebar = [{ text: 'Our Story', link: '/about/our-story' }]
Back in our themeConfig object, we want to change our sidebar to an object where the property name is a path and the value is a sidebar array.
module.exports = {
    // ...
    sidebar: {
        '/about/': primarySidebar, // everything in the /about/ subdirectory
        '/contact': primarySidebar, // contact page

        // we don't need to do anything to index
        // because the default sidebar is created via page headings
    },
}
Now, if we check out site – we’ll see that our home page has a different sidebar than all the rest.
Fantastic.
Built in Elements in VitePress
VitePress comes with support for several elements that you can declare simply in your projects either in config.js or straight in your Markdown.
I’ll only be covering some of my most frequently used ones here. Click here for the complete list of elements.
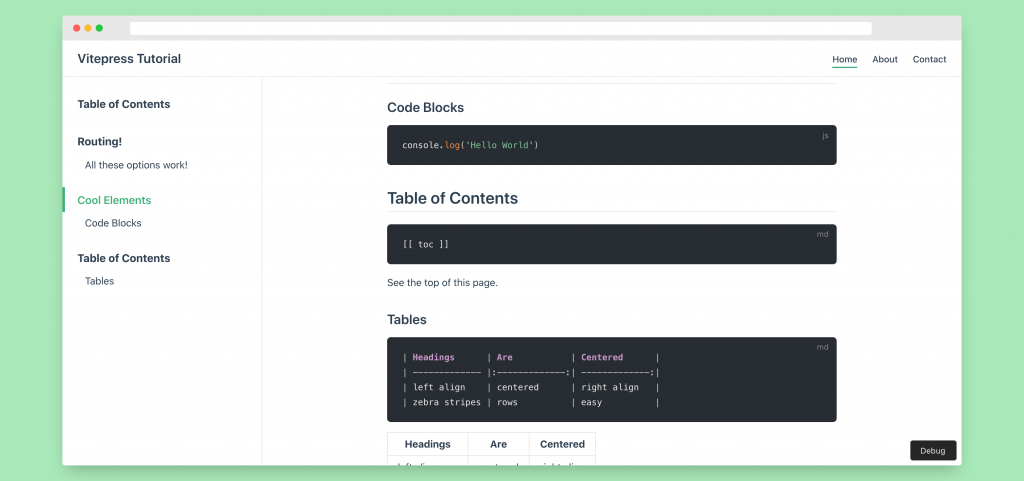
Code Blocks
When writing good documentation, code examples are vital. VitePress provides a way to quickly add code blocks and also specify what programming language it’s using.
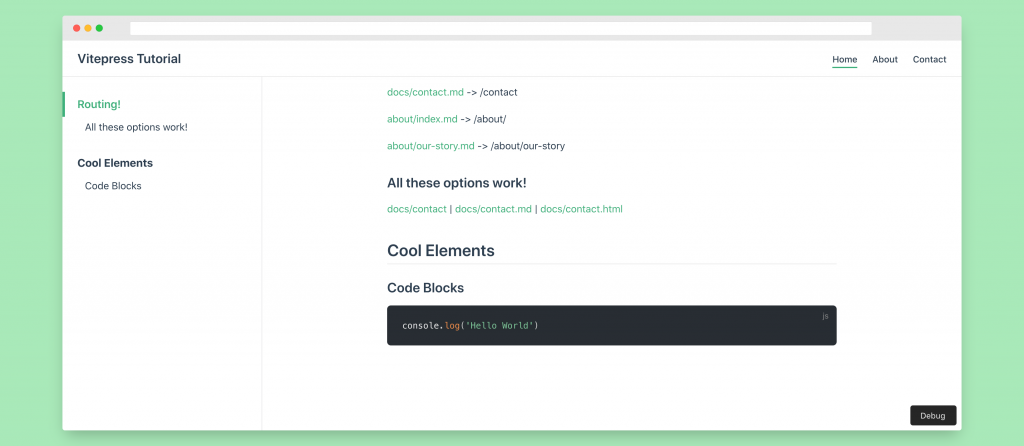
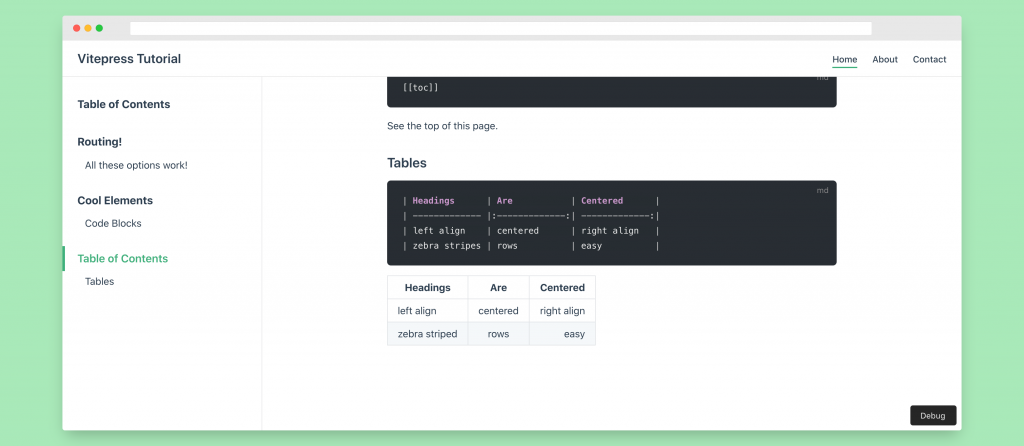
Table of Contents
Adding a table of contents can be another great way to give your Vue static site easy navigation
[[toc]]
GitHub Style Tables
Tables in VitePress can take a little getting used to, but the simplicity and the ability to change the alignment of your columns makes it valuable.
| Headings      |   Are    |    Centered |
| ------------- | :------: | ----------: |
| left align    | centered | right align |
| zebra striped |   rows   |        easy |
Markdown Frontmatter Configuration
Although we can use your ./vuepress/config.js to create site-wide configurations, sometimes we’re going to need more control over individual pages.
Thankfully, we can control each page using a YAML block at the top of our markdown files. VitePress lets us declare this block by surrounding it with three dashed lines (---)
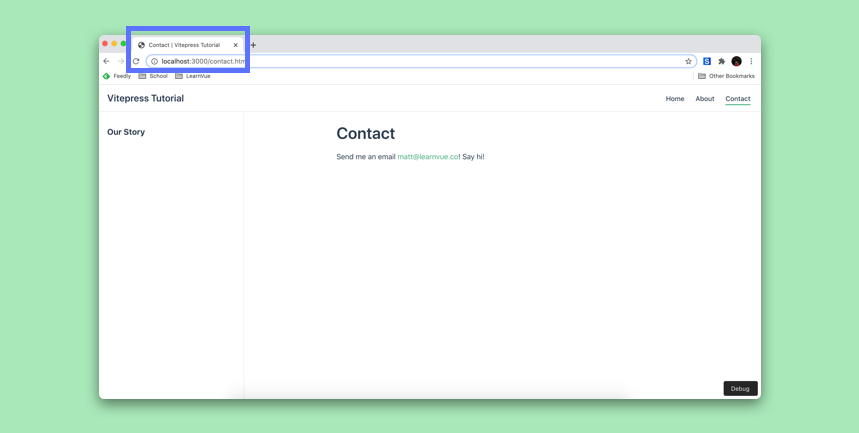
For example, let’s say we want to change the title and remove the sidebar from our Contact page.
---
title: Contact
---

# Contact
Navigating to our https://localhost:3000/contact – we can see that it works.
There are a lot of different things we can configure here. Check out the documentation for all of the Frontmatter options.
Deploying Your VitePress App
We’ve already seen that we can create your local environment using npm run docs:dev but what about building your app for production?
First, we’re going to want to build your app using the command
npm run dev:build
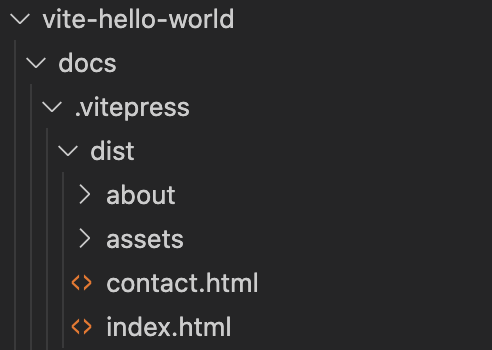
The build output will by default go to /docs/.vuepress/dist. The dist folder for our example looks like this.
We can then deploy this dist folder to whatever platform we want.
If we want to test what our build looks like, we can run Vitepress’ serve function to create a local static web server.
npm run docs:serve
Conclusion
And there you have it!
VitePress is such a great way to make sure your documentation stays up-to-date. With its opinionated design, it provides a quick and easy method for you to maintain your static sites.
I’d love to see what you think of VitePress!