Adding drag and drop functionality is a great way to make your Vue apps feel more natural and user friendly.
There are tons of use cases from making a responsive file system all the way to allowing users to build their own dashboards.
Like all UI elements, there are several drag and drop libraries out there, but honestly, it’s super valuable to understand how all of them work under the hood. And who knows? Maybe your use case is better suited to writing your own custom code.
In this tutorial, we’ll be using the built-in HTML Drag and Drop API to set up a simple drag and drop system. Like this…

Hopefully, by the end, you’ll have a better understanding of this API and how to add it into your projects. Let’s go!
Drag and Drop API
The HTML Drag and Drop API is a built-in way to enable drag and drop functionality in your app. It contains several events and properties, but we can approach it with the mindset that there are two types of elements.
- Draggable Elements – ones that can be dragged
- Droppable Elements – ones that can accept dragged elements
If we look at it like this, then it will make analyzing the Drag and Drop events much easier.
Drag and Drop Events
There are eight drag and drop events in the API that we can implement in our app.
drag– a dragged item is draggeddragstart– we start dragging a draggable elementdragend– a drag ends (e.g. we let go of the mouse)dragenter– wen a dragged item enters a droppable elementdragleave– a dragged item leaves a droppable elementdragover– a dragged item is moved over a droppable element (calls every hundred milliseconds or so)drop– a dragged item is dropped on a droppable element
The dataTransfer Object
One of the most useful things to know about the Drag and Drop API is that it adds this dataTransfer object to events.
This dataTransfer object allows us to set data when we start dragging an element and access the same data when we drop our element in a drop zone.
We should know a few properties/methods of dataTransfer (if you want to know more, check out the complete documentation).
dropEffect– the current drag and drop operation (e.g. move, copy)effectAllowed– also specifies the drag and drop operationsetData(name, val)– allows us to add values to our dataTransfer objectgetData(name)– retrieves our stored values
Creating Our Own Drag and Drop System
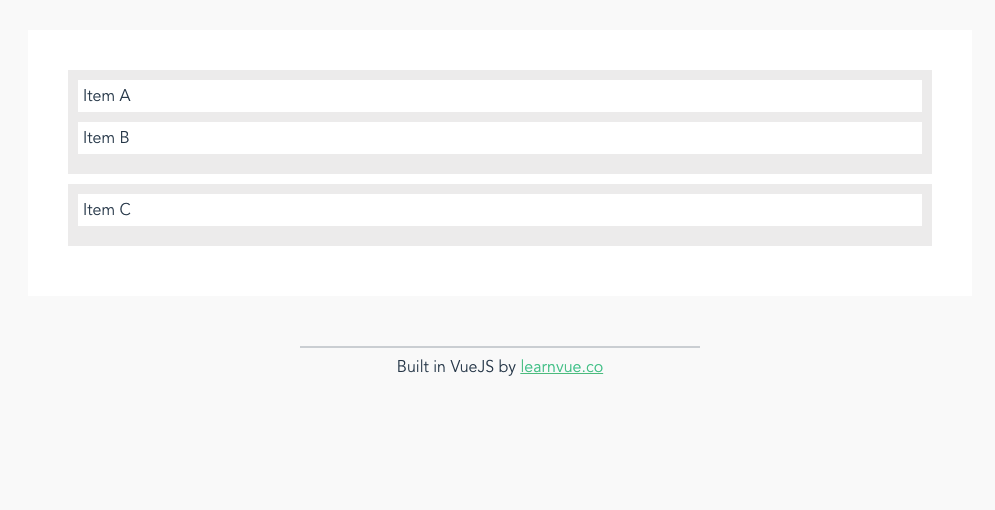
Again, here’s the example we’re going to make…
As you can see, there are two lists and we can smoothly drag and drop items between them.
Setting up our project
First, we have to set up our data. Inside our script, we’re going to create an array of items objects, each with
id– a unique id so we can look up our objectstitle– some display textlist– the list it belongs to.
I decided to add three items in this array
<script>
export default {
  data() {
    return {
      items: [
        {
          id: 0,
          title: 'Item A',
          list: 1,
        },
        {
          id: 1,
          title: 'Item B',
          list: 1,
        },
        {
          id: 2,
          title: 'Item C',
          list: 2,
        },
      ],
    }
  },
}
</script>
Then, I also created two computed properties that filtered our item list into items from List 1 and items from List 2.
<script>
export default {
  // ...
  computed: {
    listOne() {
      return this.items.filter((item) => item.list === 1)
    },
    listTwo() {
      return this.items.filter((item) => item.list === 2)
    },
  },
}
</script>
It’s better to create computed properties than to use a v-ifinside your v-for. If you would like the explanation, check out this Vue best practices article.
Creating our template code
In our template, here’s the outline of our components. This code will display everything, but have no drag and drop capabilities.
<template>
  <div>
    <div class="drop-zone">
      <div v-for="item in listOne" :key="item.title" class="drag-el">
        {{ item.title }}
      </div>
    </div>
    <div class="drop-zone">
      <div v-for="item in listTwo" :key="item.title" class="drag-el">
        {{ item.title }}
      </div>
    </div>
  </div>
</template>
It doesn’t really matter how you style your components.
But it is important that your drop zones have some height even when they have no inner elements.
Otherwise, you won’t be able to hover over it!
<style scoped>
.drop-zone {
  background-color: #eee;
  margin-bottom: 10px;
  padding: 10px;
}

.drag-el {
  background-color: #fff;
  margin-bottom: 10px;
  padding: 5px;
}
</style>
I did this by adding some padding to the drop-zone style. Here’s my entire style for this component.
Adding drag and drop functionality
Where the magic actually happens is when we start capturing our drag-and-drop events.
But, first, we need to add some methods to our script: one for when we start dragging an element and one for when we drop an element.
For the startDrag method, we want to store the id of the element we are dragging using the dataTransfer property we talked about earlier.Also, we want to tell that this drag event will be a move.
Then, in onDrop, we want to retrieve the stored id so we can access the proper item in the array.
Once we have it, we can just set its list to whatever we passed the method.
<script>
export default {
  //...
  methods: {
    startDrag(evt, item) {
      evt.dataTransfer.dropEffect = 'move'
      evt.dataTransfer.effectAllowed = 'move'
      evt.dataTransfer.setData('itemID', item.id)
    },
    onDrop(evt, list) {
      const itemID = evt.dataTransfer.getData('itemID')
      const item = this.items.find((item) => item.id == itemID)
      item.list = list
    },
  },
}
</script>
Okay. Now that we have that out of the way, we can add our template code.
Let’s start with adding events to our items. We will need to make our element draggable and detect the drag start event.
<div
  class="drag-el"
  v-for="item in listTwo"
  :key="item.title"
  draggable
  @dragstart="startDrag($event, item)"
>
  {{ item.title }}
</div>
Since we added the draggable attribute, if you run your app, you should be able to drag your element around like this, but you won’t be able to drop it anywhere.
Let’s give it a drop zone to accept our new draggable elements.
First, we have to add the drop event listener that calls our onDrop method.
<div class="drop-zone" @drop="onDrop($event, 1)"></div>
However, one thing that is not-intuitive is that we have to call preventDefault on two of the drag-and-drop hooks: dragEnter and dragOver.
This is because, by default, those two methods do not allow elements to be dropped. So, for our drop event to work properly, we have to prevent their default action.
We can do this using Vue’s built in .prevent event modifier.
<div
  class="drop-zone"
  @drop="onDrop($event, 1)"
  @dragover.prevent
  @dragenter.prevent
></div>
And that should be it!
If we run our app now, we should see that everything works as expected. We can drag and drop elements between our two different lists.
Get Notified When Courses Launch
The first batch of courses is scheduled to come out soon:
- Fullstack Nuxt (Supabase, Drizzle, TypeScript)
- Writing Better Vue Composables
- Building a Nuxt Content Site
Be the first to know when courses drop (and maybe even get early access) by joining the waitlist.
Conclusion
While this example is a very simple one, it’s neat to see how the HTML Drag and Drop API works and get some hands on experience with it. It’s really not as intimidating as it first appears.
I hope that you picked up a thing or two from this tutorial and have thought of interesting ways to implement these techniques into your projects!