In Vue, there are two ways to conditionally render parts of your app: v-ifand v-show.
You may be wondering, “Why do we need two ways to this?”
And this is a fantastic question, and definitely one that I had when learning Vue. And the answer is because even though these directives have similar end results, the way they conditionally show your content works differently.
In this tutorial, we’ll take a look at what conditional rendering is, how v-ifand v-show work, and when you should use each one.
Alright, let’s jump right in.
So what even is conditional rendering?
Conditional rendering is the ability to control whether or not template code is rendered. We can do this using the current state of our application.
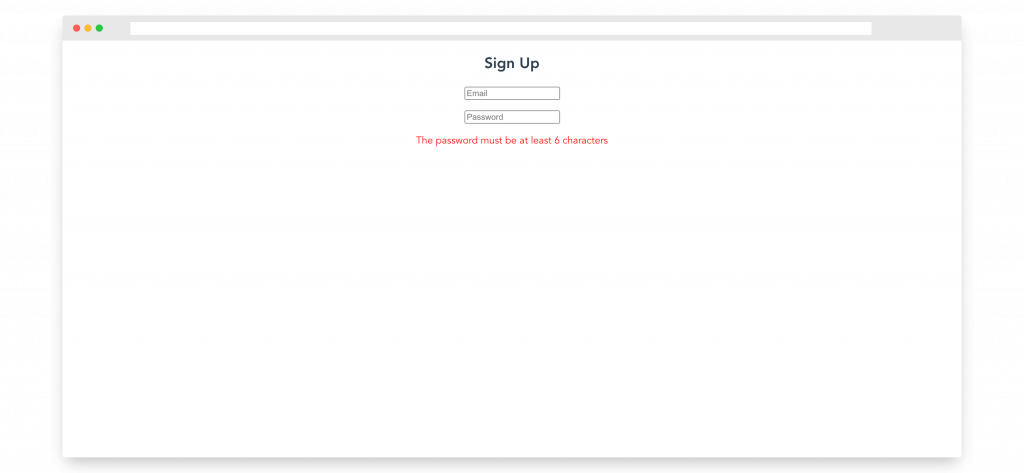
Let’s take a look at an example. Imagine that we are creating a form, and we want to display an invalid input error message if our password is less than 6 characters long.
So in our template, we’ll create a basic form area with a few inputs. And in our script, we’ll use v-model to make our form model our data.
<script>
export default {
  data() {
    return {
      email: '',
      password: '',
    }
  },
}
</script>

<template>
  <div>
    <h2>Sign Up</h2>
    {{ email }} {{ password }}
    <p><input v-model="email" type="text" placeholder="Email" /></p>
    <p>
      <input v-model="password" type="password" placeholder="Password" />
    </p>
  </div>
</template>
Next, let’s add a <p> element with a class of error-message under our password field.
<template>
  <div>
    <h2>Sign Up</h2>
    {{ email }} {{ password }}
    <p><input v-model="email" type="text" placeholder="Email" /></p>
    <p>
      <input v-model="password" type="password" placeholder="Password" />
    </p>
    <p class="error-message">The password must be at least 6 characters</p>
  </div>
</template>
Alright, if we run our Vue app, we should see something like this in the browser.
So now, we can use conditional rendering to only show this error message when our password has a length less than 6.
For this example, we’ll use the v-ifdirective, so on our <p> tag, we can just say v-if and then pass in a boolean statement. If this statement is true, the element will render. If it’s false it won’t render. Simple, enough – right?
<template>
  <div>
    <h2>Sign Up</h2>
    {{ email }} {{ password }}
    <p><input v-model="email" type="text" placeholder="Email" /></p>
    <p>
      <input v-model="password" type="password" placeholder="Password" />
    </p>
    <p v-if="password.length < 6" class="error-message">
      The password must be at least 6 characters
    </p>
  </div>
</template>
Awesome! Our error message now renders at the right times!
Back in our code, we can change v-if to v-show and if we’ll see that our app appears to function exactly the same.
<template>
  <div>
    <h2>Sign Up</h2>
    {{ email }} {{ password }}
    <p><input v-model="email" type="text" placeholder="Email" /></p>
    <p>
      <input v-model="password" type="password" placeholder="Password" />
    </p>
    <p v-show="password.length < 6" class="error-message">
      The password must be at least 6 characters
    </p>
  </div>
</template>
However, they don’t work the same. In the next section, we’ll see exactly why.
What’s the Difference Between v-if and v-show?
The key difference is that v-if conditionally renders elements and v-show conditionally displayselements.
This means that v-if will actually destroy and recreate elements when the conditional is toggled. Meanwhile, v-show will always keep the element in the DOM and will only toggle its display by changing its CSS.
We can easily see these by running inspect element for both a v-if and a v-show. So let’s say we have the following code that has both types of conditionals and a button that toggles them.
<script>
export default {
  data() {
    return {
      active: false,
    }
  },
}
</script>

<template>
  <div>
    <p v-if="active">Using v-if</p>
    <p v-show="active">Using v-show</p>
    <button @click="active = !active">Toggle active</button>
  </div>
</template>
When our elements are displayed, the DOM looks like this.

And when we press the button, the DOM looks like this.
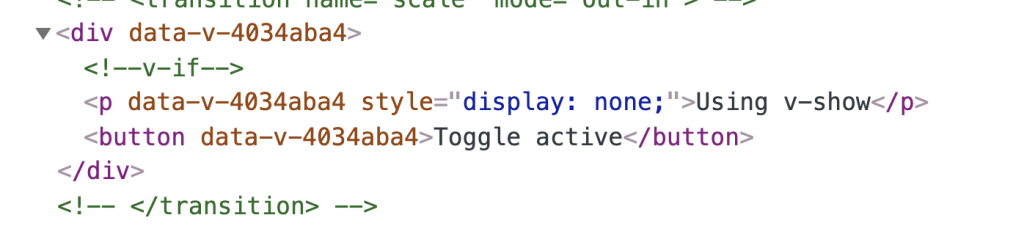
As you can see, with v-if, the conditional block is completely removed from the DOM. But with v-show, it’s display is set to none.
And voila! Just like that, we now know the difference between v-if and v-show.
Get Notified When Courses Launch
The first batch of courses is scheduled to come out soon:
- Fullstack Nuxt (Supabase, Drizzle, TypeScript)
- Writing Better Vue Composables
- Building a Nuxt Content Site
Be the first to know when courses drop (and maybe even get early access) by joining the waitlist.
When would you want to use each one?
Just like all choices in development, it’s important to carefully consider when to use v-if and when to use v-show.
As a general rule for performance, v-if has higher toggle costs (whenever the conditional changes) and v-show has higher initial render costs.
So if you need to toggle something frequently, use v-show.
If the conditional does not change that frequently during the runtime, use v-if.
Another thing to consider is that using v-if allows us to use other logic blocks in combination with it. Specifically, we can use v-else and v-else-ifblocks to really build advanced logic into our app.
<p v-if="active">Using v-if</p>
<p v-else-if="true">Else if statement</p>
<p v-else>Else statement</p>
So as you can see, there are different times when each is useful. Of course, it 100% depends on your use case, so just be sure to think about it instead of just randomly choosing one!
And that’s all
Alright! I hope this quick little article helped you understand the difference between how the v-if and v-show directives work.
As always, if you have any questions at all, leave them in the comments down below.
And I’d love to hear what other topics you’d like to see covered here on LearnVue. It’s super important to us to be be making useful guides, and a lot of that has come from your feedback!