Plugins are a great way to add reusable functionality to your Vue apps. With tons of existing plugins for components, routing, and more, the ecosystem for Vue has solutions for many common use cases.
Some examples of commonly used plugins are vue-router, vue custom-element, and vue-touch.
However, there will come a time when there isn’t a plugin that perfectly matches your project, or a time when you want to build your own plugins and share them with the world.
In this tutorial, we’ll be taking a look at how to build your very own Vue 3 plugin.
What can we do with Vue plugins?
Simply put, Vue plugins allow us to extract any kind of functionality into its own self-contained code that can be reused across different projects.
Typically, they’re used to add global-level functionality to your Vue app. Per the Vue Docs, here are some of the most common uses for plugins.
- Adding global components
- Adding global directives, transitions, or other assets
- Adding component options with global mixins (like vue-router)
- Adding addition properties onto a Vue instance (via app.config.globalProperties)
We’ll be diving into each one of these situations later in this tutorial, but first let’s actually go ahead and create our first plugin.
Creating our Vue 3 plugin
In this tutorial, we’re going to make a plugin that adds features that allow us to add UI elements and styles to our Vue app.
For our plugin, let’s make a file called MyPlugin.js and inside we’ll create an export default with an install method. And this method will have two arguments:
app– the app coming from Vue’screateAppmethodoptions– any options passed in when adding our plugin to our Vue instance
export default {
  install: (app, options) => {
    /*  our code for the plugin goes here
            app is the result of createApp()
            options is user options passed in
        */
  },
};
Then, to actually insert this plugin into your Vue app, we can go into our main.js file and use app.use().
import { createApp } from "vue";
import App from "./App.vue";
import MyFirstPlugin from "./plugin";

const app = createApp(App);

app.use(MyFirstPlugin /* can pass options as second param */);

app.mount("#app");
Alright! We’re ready to start adding some functionality to our plugin.
Get Notified When Courses Launch
The first batch of courses is scheduled to come out soon:
- Fullstack Nuxt (Supabase, Drizzle, TypeScript)
- Writing Better Vue Composables
- Building a Nuxt Content Site
Be the first to know when courses drop (and maybe even get early access) by joining the waitlist.
Adding Global Components from a Vue Plugin
A great use for a Vue plugin is to add global components than can be used anywhere in your Vue project without having to explicitly import them.
Using the app argument (which gives us access to our Vue instance), we can declare our global component using the app.component syntax.
With using app.component, we can either use a single file component or declare our component directly in our JavaScript file. We’re going to be making our own SFC.
Let’s say that we want to create a header component – we’ll call it MyHeader.vue – that contains information for an article post.
<template>
  <div>
    <h1 class="header-title">
      <slot name="title" />
    </h1>
    <h2 class="title-author">
      <slot name="author" />
    </h2>
  </div>
</template>
To add it to our plugin, we can go to MyFirstPlugin.js and add it like this inside of our install method.
import MyHeader from "./components/MyHeader.vue";
export default {
  install: (app, options) => {
    /* declare global component */
    app.component("my-header", MyHeader);
  },
};
Now, we can use MyHeader anywhere in our Vue app because it’s been registered globally.
Let’s check it out inside App.vue. For example. No imports needed, we can just add it to our template.
<template>
  <my-header>
    <template #title>
      Building Your Own Vue 3 Plugin - <i> A Full Guide </i>
    </template>
    <template #author>
      Matt Maribojoc
    </template>
  </my-header>
</template>
And our end result should look something like this!
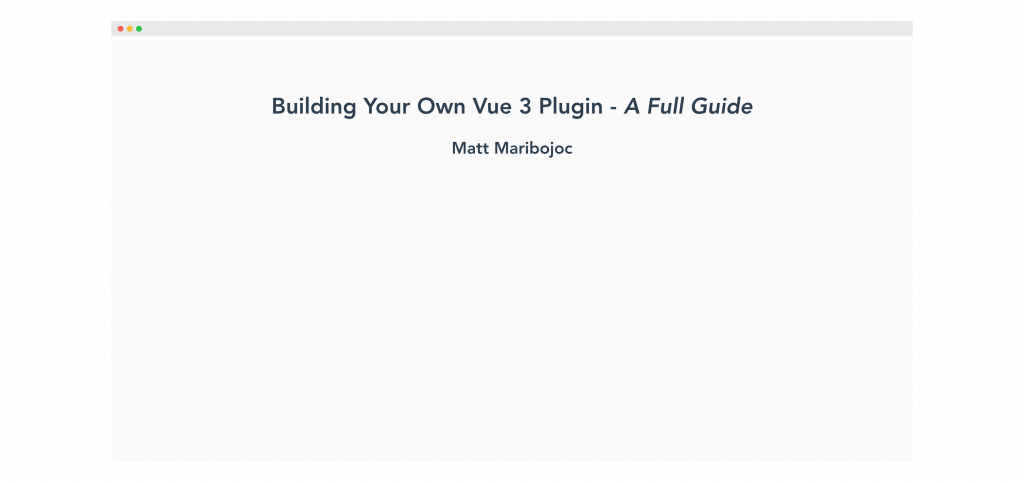
Awesome.
We can also add styles in these components
If we add any non-scoped styles to our component, we can easily style our Vue app.
For example, if we wanted to change the font-size and background color of our entire project, we can do that inside of our MyHeader component.
<template>
  <div>
    <h1 class="header-title">
      <slot name="title" />
    </h1>
    <h2 class="title-author">
      <slot name="author" />
    </h2>
  </div>
</template>

<style>
  html, body, * {
      font-size: 1.2em;
      background: #fafafa;
  }
</style>
And let’s take a look back at our browser.
Cool – everything is being updated according to our styles, but these can always be overridden in child components like any other CSS.
Adding Global Directives with Vue Plugins
One of my favorite things in Vue is the ability to create your own directives.
Directives are one way Vue gives developers the power to directly edit the DOM. Some examples are v-if, v-show, v-bind, and so on. If you’ve worked in Vue, you are definitely familiar with directives.
And with plugins, we can easily create directives using app.directive that can be used across several projects.
Let’s say that we wanted to create a directive that changes the size of your text. And if you want to learn more about how exactly this directive works, check out our Guide to Vue Directives.
In short, we want to accept a directive argument that determines the font size of our element, then change the style of that element (via el) to use the appropriate size.
export default {
  install: (app, options) => {
    app.component("my-header", MyHeader);

    app.directive("font-size", (el, binding, vnode) => {
      var size = 16;
      switch (binding.arg) {
        case "small":
          size = 12;
          break;
        case "large":
          size = 24;
          break;
        default:
          size = 18;
          break;
      }
      el.style.fontSize = size + "px";
    });
  },
};
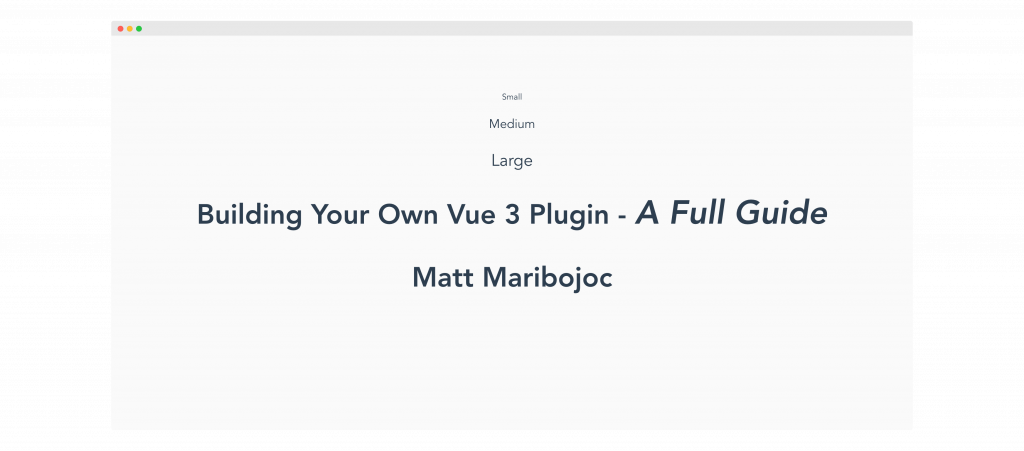
Then, inside App.vue – or any component since it’s available globally – we can use our directive like this.
<template>
  <p v-font-size:small>Small</p>
  <p v-font-size:medium>Medium</p>
  <p v-font-size:large>Large</p>

  <my-header>
    <template #title>
      Building Your Own Vue 3 Plugin - <i> A Full Guide </i>
    </template>
    <template #author>
      Matt Maribojoc
    </template>
  </my-header>
</template>
The result should look like this.
Using Plugin Options to Provide Customization
This is a great opportunity to discuss that second argument of our install method – options. Adding options to your plugin is a great way to make it more flexible for different use cases.
Let’s say that we want developers to be able to control the exact size of the small, medium, and large arguments.
If we go back to main.js, we can add a second argument to our app.use function that added our plugin to our Vue app.
Inside, let’s create an object that specifies each of our font sizes.
app.use(MyFirstPlugin, {
  fontSize: {
    small: 12,
    medium: 24,
    large: 36,
  },
});
Then, back in our plugin, instead of hardcoding our font sizes, we can use the options object to pull whatever was passed to our plugin.
app.directive("font-size", (el, binding, vnode) => {
  var size = 16;
  switch (binding.arg) {
    case "small":
      size = options.fontSize.small;
      break;
    case "large":
      size = options.fontSize.large;
      break;
    default:
      size = options.fontSize.medium;
      break;
  }
  el.style.fontSize = size + "px";
});
Now, if we look back, we can see that we are successfully using our specified font sizes in our application.
Adding Methods, Data, and other Component Options with Mixins
A common way that plugins add reusable functionality to your Vue app is by using Vue mixins. Mixins are a way to add component options to Vue components.
We can add any component options like lifecycle hooks, data, and methods and if a component uses this mixins, these options will be merged with that component’s option.
It’s important to understand how these options are merged. For example, mixin lifecycle hooks will be called before component hooks and component data will take precedence over mixin data if there’s a naming conflict.
We can create a global mixin using the app.mixin method.
Let’s say that we wanted to add a created hook that just prints a log statement to our console and wanted to give a data property that gives an external URL that we can use for changing the href property of links throughout our app.
export default {
  install: (app, options) => {
    app.mixin({
      data() {
        return {
          featuredLink: "https://learnvue.co",
        };
      },
      created() {
        console.log("Printing from created.");
      },
    });
  },
};
In any component that we use, this created hook will run and we can access our featuredLink property.We have two prints – one for App.vue and one for MyHeader.vue.
Using Provide and Inject with Vue Plugins
One powerful way to give specific components access to different properties and methods is by using the provide and inject pattern in Vue.
This allows our plugin to “provide” a property or method and allows any component to “inject” this value.
Let’s take a look at an example where we are creating a logout method. We don’t need this method to be available to every single component, but we want to only create one logout method so it’s easier to modify in the future.
Inside our plugin, we declare our method (for now, we’ll just log to the console) and call app.provideto provide it to the rest of our app. The syntax for app.provide goes (key, value)
import { provide } from "vue";

export default {
  install: (app, options) => {
    const logout = () => {
      console.log("Logout is being called");
    };

    app.provide("logout", logout);
  },
};
Then, inside any component, we can inject this method and we’ll create a button that calls our logout method.
<template>
  <button @click="logout">Logout</button>
  <p v-font-size:small>Small</p>
  <p v-font-size:medium>Medium</p>
  <p v-font-size:larg>>Large</p>
  <a :href="featuredLink"> Featured Link </a>
  <my-header>
    <template #title>
      Building Your Own Vue 3 Plugin - <i> A Full Guide </i>
    </template>
    <template #author> Matt Maribojoc </template>
  </my-header>
</template>

<script setup>
  import { inject } from 'vue'
  const logout = inject('logout')
</script>
If we take a look at this, we’ll see that whenever we click our button – our log statement from our plugin is printing to the console.
Fantastic 😌
Final Thoughts
The possibilities for designing your own Vue 3 plugins are endless. With so many phenomenal plugins for translation, routing, and more, the principles that we covered in this tutorial are the core building blocks for some complex tools.
I’d love to see what you can make with what we’ve learned here. Drop links to your own Vue plugins down below. Or if you have any questions, just let me know.
Happy coding!